![]()
![]()
![]()
![]()
![]()
Dipl.-Ing. Thorsten Niggemann
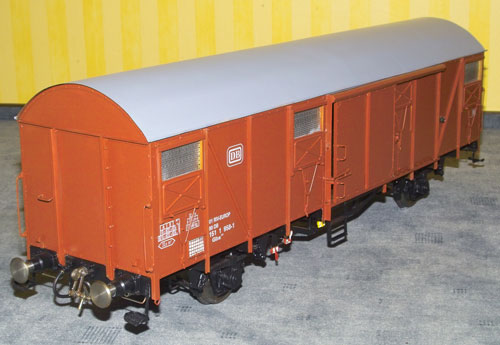
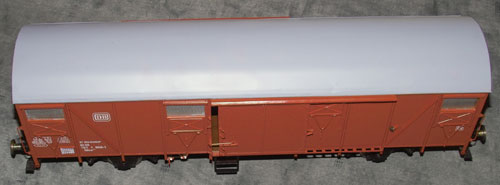
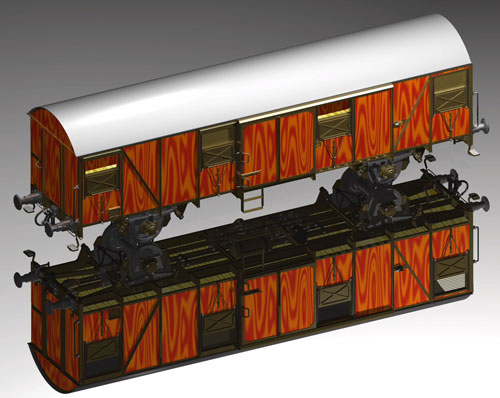
Large covered goods wagon of type Glmehs50
Anyone who wants matching wagons for his 5“ engine can buy them from the appropriate supplier as a finished product or kit. But what do you do, if you want to build it all by yourself?
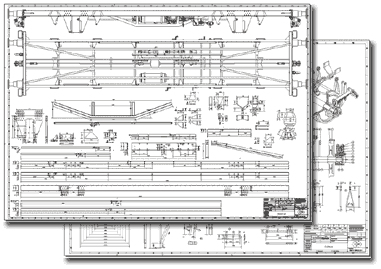
After a long and unsuccessful search for a usable drawing, we went to the Verkehrs Museum Nuremberg , where we obtained the appropriate details of the drawings. From this information we produced a set of drawings with all the necessary details of the model covered goods wagon.

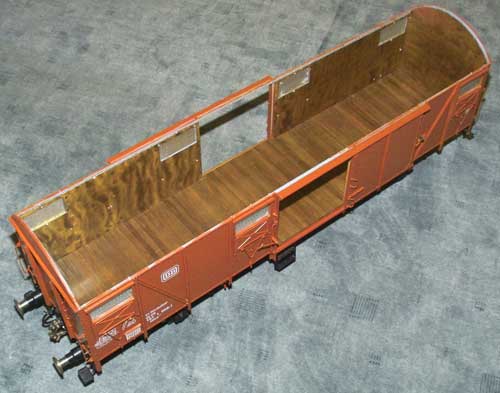
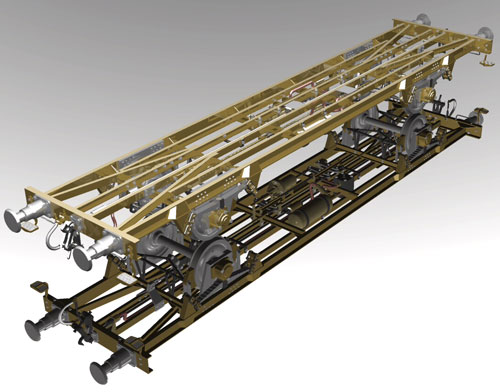
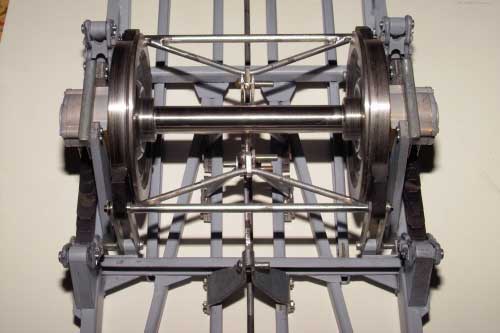
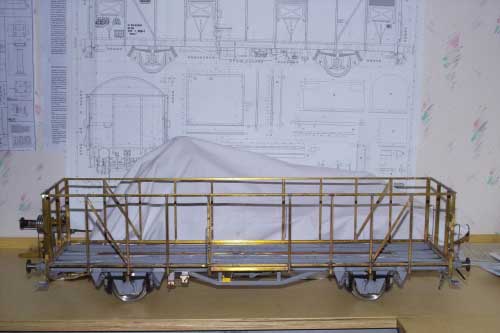
The basic frame is mainly made of C-section. The complete design is soldered and partly riveted. We used galvanized section, but brass section is also strong enough and much easier to solder.
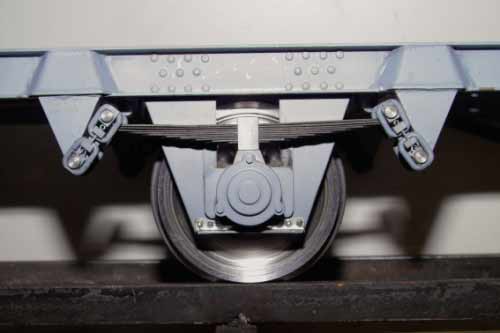
The leaf spring is fully functional. The spring material is available in metre lengths.
To heat-treat the completed leaf spring , heat to cherry red, then quench in oil from the last engine oil change. Re-heat to blue and quench in oil again to temper it.
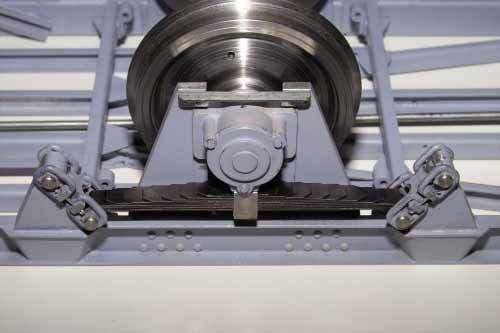
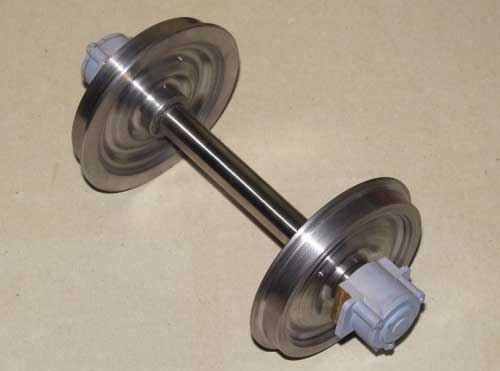
The axle box is milled from the solid. Each axle box is provided with two ball races, which give improved load bearing.
This goods wagon is provided with a fully functioning braking system.
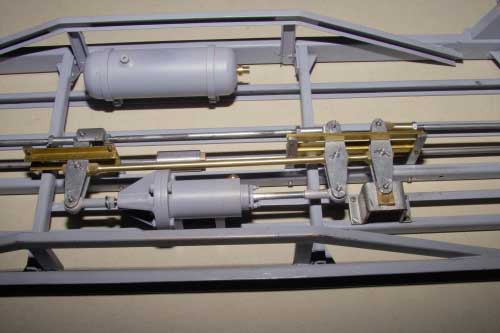
The braking system is a vacuum brake. You can find the necessary brake operating valve on the constructional drawings. The advantage of this vacuum brake is that before the engine starts to move off, the receiver will be filled by the brake operating valve, and at the same time the brakes are released. For braking, the constant main air pipe bleeds. The non-return valve prevents the receiver from being emptied as well. The brake operating valve reacts and directs air from the receiver into the brake cylinder and the brakes engage. To take off the brakes, air is directed into the main air pipe. The advantage of this system is that if a wagon becomes uncoupled and the train pipe breaks, the brakes will be applied automatically and the wagon will come to a standstill.
We will fit the brake operating valve later on. At the moment the brake cylinder is directly connected to the main air pipe. The receiver has no function in this model.
Die Aufbauten
The Body Parts
The Body Parts
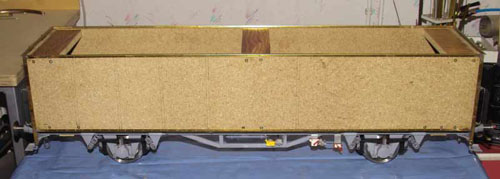
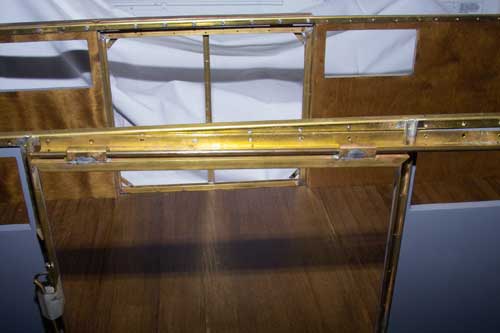
The body parts are all made from brass. The body frame construction has to be strengthened by soldering. The advantage is that the small pieces which are fitted later, can be fastened without accidentally melting other soldered seams . Before driving ourselves crazy, we made a simple chipboard box and screwed it on top of the wagon. We positioned the U- and L-sections on the box and soldered them together.
After soldering all the sections, the box needed to be carefully removed. The result was amazing, nothing was lopsided and the frame was already stable.
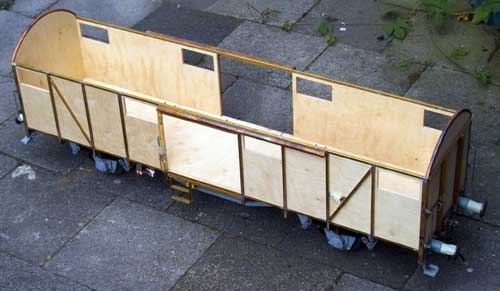
The side walls and the floor piece are made of 6 mm MDF / plywood. After sawing and adapting, I pasted 1 mm thick wood veneer strips onto the floor board. The floor board and the inside of the side walls have to be stained darkbrown and afterwards painted with clear varnish. The outside of the side walls are smoothed with surfacer for cars and then with a finer one. Before fitting the walls, primer needs to be sprayed onto the outside of the walls. You need to take care that the edges of the wood are varnished as well, then the wood cannot become damp and thereby uneven. The side walls are nailed on the structure with brass nails. The floor should be removable so that access can be made to the braking system.
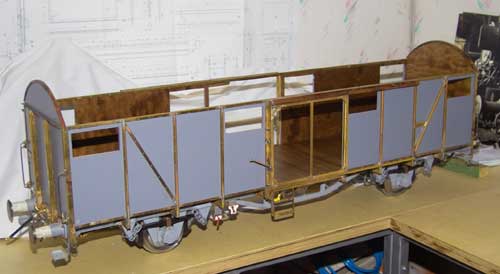
The sliding door
To make sure that the sliding door can be opened, I looked at different sliding doors from other model makers. Some had tried to hang the sliding door up on rollers into tracks, like the original, but unfortunately it jammed or jumped off the tracks. That is why I hung the sliding door into sliding bushings with round tracks. Now it travels freely.
paintwork and labelling
There is nothing to say about the paintwort, just have a look.
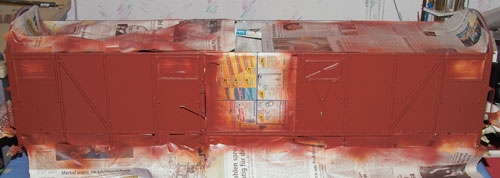
The lettering looks really good. It was quite easy:
I made the layout in Corel Draw, this is a vector orientated graphics program. I just took a few pictures of the original goods wagon and loaded them into the graphics program. From these I produced the correct scale lettering. I sent the Corel Draw file to someone to print it out in the following way:
Transparency with white lettering for detaching in water.
I received it 4 days later after sending € 11.00 for a DIN A4 page. Great.
I cut it out, put it into water and placed it carefully in the right place. You still can correct it, by moving it a little bit. I squeezed the air out with a foam sponge. After all the water is evaporated, you should spray clear varnish on it again to make it weather proof. Further information about someone who makes the prints, is to be found on www.drucker-onkel.de or send him an e-mail: info(at)drucker-onkel.de